This post may contain affiliate links. This means that if you make a purchase from those links I receive a commission at no additional cost to you. Thank you for continued support!
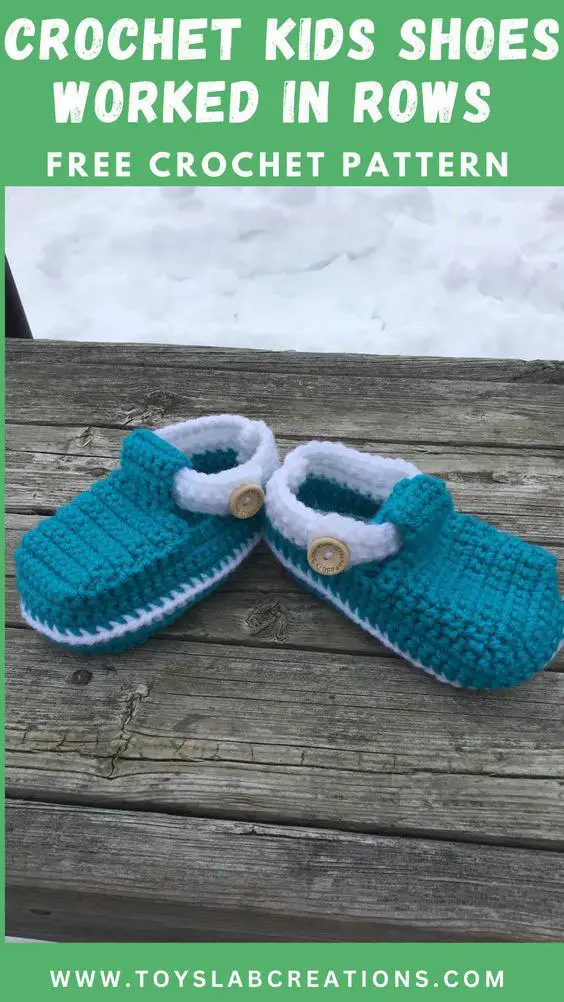
This crochet child sandals is the child version of this baby booties worked flat. This crochet kids sandals works up super fast, its very beginner friendly and its super cute.
With this pattern, you can make your kids adorable sandals just working in rows and it’s more convenient and faster than working in the round and you can be sure that your sandals will come out the same size. Heck Yeah! You won’t have to make a third one just to have two match up!
DESIGN
The crochet kids sandals pattern is super cute. It starts with the sole worked the rows, then the upper part is made, then the button hole and button straps are made on opposite sides for both right and left sandals, then the middle part and finally the middle strap is made, sew up seam and attach buttons and your crochet kids sandals is all done.
EASY
This crochet kids sandals pattern is quite easy to make, it uses mainly the single crochet stitch. You can also watch the baby version of the crochet baby slippers to understand the pattern better, if you prefer video tutorial.
UNIQUE
This easy crochet kids slippers has a unique design, it’s not like most regular slippers. It is a fun crochet slipper pattern that your kid will love!
YARN
I used worsted weight yarn for this crochet kids sandals pattern, you can use any worsted weight yarn of your choice, either solid color or self striping yarn, I’m sure it will turn out cute.
SIZES
This crochet kids sandals pattern has seven sizing options 5.0 (5.5,6.0,6.5,7.0,7.5,8.0) which includes toddlers and kids sizes and it also contains photo tutorial.This blog post contains instructions for sole size 6.5 inches, which fits 4-5 years old kids.
Read on to find the free crochet pattern for size 6.,5 inches sole in both US and UK terms below or find the ad-free printable pdf version on Ravelry, Love Crafts, Ko-fi and Etsy.
Sign up for newsletter here
Video Tutorial
If you prefer video tutorials, you can watch the video tutorial for the baby version above.
Also watch more crochet video tutorials of my patterns on my YouTube channel. Subscribe and turn on notifications so you won’t miss any of my future videos. Happy crocheting!
PDF PATTERN
If you prefer to work offline or if you would like to support my work or you want to make the pattern in bigger sizes, purchase the ad-free printable pdf version, including all photo tutorials on Ravelry, LoveCrafts, Ko-fi and Etsy.
Purchase the Ad-Free PDF below


PIN it for later here
Save this pattern to your Ravelry favourites here
Check Out These Other Free Crochet Patterns
EASY CROCHET KIDS SLIPPERS | FREE PATTERN
Materials:
4.0 mm crochet hook
Worsted weight yarn – 2 (100g) balls
Colour A = grey
Colour B = White
Stitch markers (Optional)
Yarn needle
Difficulty:
Beginner
Gauge:
16 stitches /8 rows= 10 cm/4 inch square in Dc
Stitches (US Version):
Ch: Chain
Sc: Single Crochet
Hdc: Half Double crochet
Dc: Double crochet
Slst: Slip Stitch
Pattern Notes:
- Ch 1 or Ch 2 at the beginning of the row does not count as a stitch.
- The slipper is worked flat.
- The 6th row is used to determine the right side when sewing the slipper. The side with the visible ridges is the right side.
- The slst at the middle part should be done tightly to avoid lumps at the corners.
Pattern Instructions:
Ch 37
Row 1:1 Sc in the 2nd chain from the hook, Mark the stitch with a stitch marker, 1 Sc in each stitch across. 36 stitches.
Row 2: Ch 1, turn. 2 Sc in the 1st stitch, mark the very first stitch, 1 Sc in the next 14 stitches, 2 Sc in each of the next 6 stitches, 1 Sc in the next 14 stitches, 2 Sc in the last stitch. 44 stitches.
Row 3: Ch 1, turn. 2 Sc in the 1st stitch, mark the very first stitch, 1 Sc in the next 18 stitches, 2 Sc in each of the next 6 stitches, 1 Sc in the next 18 stitches, 2 Sc in the last stitch. 52 stitches.
Row 4: Ch 1, turn. 2 Sc in the 1st stitch, mark the very first stitch, 1 Sc in the next 8 stitches, 1 Hdc in the next 7 stitches, 1 Dc in the next 7 stitches, 2 Dc in each of the next 6 stitches, 1 Dc in the next 7 stitches, 1 Hdc in the next 7 stitches, 1 Sc in the next 8 stitches, 2 Sc in the last stitch. 60 stitches.
Row 5: Ch 1, turn. 2 Sc in the 1st stitch, mark the very first stitch, 1 Sc in the next 10 stitches, 1 Hdc in the next 10 stitches, 1 Dc in the next 18 stitches, 1 Hdc in the next 10 stitches, 1 Sc in the next 10 stitches, 2 Sc in the last stitch. Finish row with a slst of colour B. 62 stitches.
Row 6: (With Color B) Ch 2, turn. 1 Hdc in the front loop only of the 1st stitch, mark stitch, 1 Hdc in the front loops only in each stitch across. Finish row with a slst of colour A. 62 stitches.
Row 7:(With Color A) Ch 1, turn.1 Sc in the 1st stitch, mark stitch, 1 Sc in each stitch across. 62 stitches.
Row 8-10: Repeat row 7, finish the last Sc with Slst with colour B 62 stitches.
RIGHT SANDAL
BUTTON HOLE STRAP
Row 1: With Colour B, Ch 1, Sc in the same stitch, mark stitch, 1 Sc in the next 9 stitches 10 stitches, Ch 17
Row 2: Skip the 1st stitch, 1 Sc in the next chain stitch,1 Sc the remaining 15 chains, 1 Sc in each of the 10 Sc of previous row. 26 stitches.
Row 3: Ch 1, 1 Sc in the 1st stitch and in each stitch till there are 3 stitches remaining, Ch 2, skip 2 stitches, 1 Sc in the last stitch. 26 stitches.
Note: The Ch 2 space is the button hole,
Row 4: Ch 1, 1 Sc in the 1st stitch, mark stitch, 1 Sc in each of the 2 Ch stitches, 1 Sc in each of the remaining stitches of previous row. 26 stitches. Ch 1 and cut yarn. Strap completed.
BUTTON STRAP
Row 1: With Colour B, join yarn with a slst to the other side of the sandal, Ch 1, Sc in the 1st stitch, mark stitch, 1 Sc in the next 9 stitches. 10 stitches.
Row 2: Ch 1, turn, 1 Sc in the 1st stitch, mark stitch, 1 Sc in the next 9 stitches. 10 stitches.
Row 3-4: Repeat row 2. Ch 1 and cut yarn . Strap completed.
LEFT SANDAL
BUTTON STRAP
Row 1: With Colour B, Ch 1, Sc in the 1st stitch, mark stitch, 1 Sc in the next 9 stitches. 10 stitches.
Row 2: Ch 1, turn, 1 Sc in the 1st stitch, mark stitch, 1 Sc in the next 9 stitches. 10 stitches.
Row 3-4: Repeat row 2. Ch 1 and cut yarn . Strap completed.
BUTTON HOLE STRAP
Row 1: With Colour B, join yarn with a slst to the other side of the sandal, Ch 1, Sc in the same stitch, mark stitch, 1 Sc in the next 9 stitches 10 stitches, Ch 17
Row 2: Skip the 1st stitch, 1 Sc in the next chain stitch,1 Sc the remaining 15 chains, 1 Sc in each of the 10 Sc of previous row. 26 stitches.
Row 3: Ch 1, 1 Sc in the 1st stitch and in each stitch till there are 3 stitches remaining, Ch 2, skip 2 stitches, 1 Sc in the last stitch. 26 stitches.
Note: The Ch 2 space is the button hole,
Row 4: Ch 1, 1 Sc in the 1st stitch, mark stitch, 1 Sc in each of the 2 Ch stitches, 1 Sc in each of the remaining stitches of previous row. 26 stitches. Ch 1 and cut yarn. Strap completed.
THE MIDDLE PART
From each strap count 16 stitches and mark the center 10 stitches.
Row 1: With Colour A, join yarn with a Slst to the stitch before the marked stitch, Ch 1, 1 Sc in each of 10 stitches, replace stitch markers, Slst in the next 2 unworked stitches.
Row 2: Ch 1, 1 Sc in each of the Sc of previous row, skip the stitch that was slipped stitch into in row 1, Slst in the next 2 unworked stitches.
Row 3-14: Ch 1, 1 Sc in each of the Sc of previous row, skip the 2 stitches that was slipped stitch into in previous row, Slst in the next 2 unworked stitches. Ch 1 and cut yarn.
Note: On both sides there will be 2 stitches left unworked.
Reattach Colour A with a slst to 3rd stitch of the last row.
Row 1: Ch 1, 1 Sc in 1st stitch, Sc in each of the next 5 stitches. (6 Sc)
Row 2-11: Ch 1, turn, 1 Sc in 1st stitch, 1 Sc in each of the remaining 5 Sc from previous row. Ch 1 , leave a long tail and cut yarn. Strap completed.
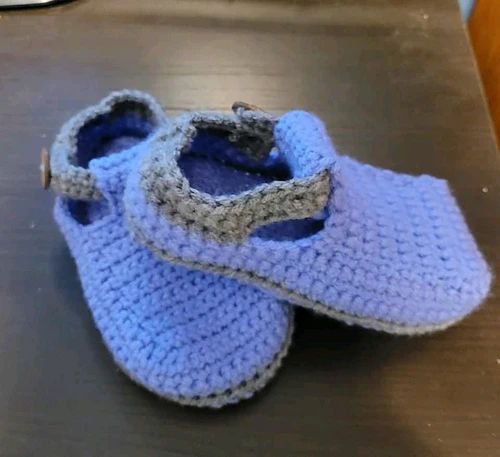
FINISHING
Fold the middle strap in half to the wrong side and sew in place.
Fold the sandals with right side facing and sew up seam, using appropriate colours. Sew up part made with colour A with colour A and part made with colour B with colour B.
Sew buttons in place.
FINISHED SANDALS
Materials:
4.0 mm crochet hook
Worsted weight yarn – 2 (100g) balls
Colour A = grey
Colour B = White
Stitch markers (Optional)
Yarn needle
Difficulty:
Beginner
Gauge:
16 stitches /8 rows= 10 cm/4 inch square in Tr
Stitches (UK Version):
Ch: Chain
Dc: Double Crochet
Htr: Half treble crochet
Tr: Treble crochet
Slst: Slip Stitch
Pattern Notes:
- Ch 1 or Ch 2 at the beginning of the row does not count as a stitch.
- The slipper is worked flat.
- The 6th row is used to determine the right side when sewing the slipper. The side with the visible ridges is the right side.
- The slst at the middle part should be done tightly to avoid lumps at the corners.
Pattern Instructions:
Ch 37
Row 1:1 Dc in the 2nd chain from the hook, Mark the stitch with a stitch marker, 1 Dc in each stitch across. 36 stitches.
Row 2: Ch 1, turn. 2 Dc in the 1st stitch, mark the very first stitch, 1 Dc in the next 14 stitches, 2 Dc in each of the next 6 stitches, 1 Dc in the next 14 stitches, 2 Dc in the last stitch. 44 stitches.
Row 3: Ch 1, turn. 2 Dc in the 1st stitch, mark the very first stitch, 1 Dc in the next 18 stitches, 2 Dc in each of the next 6 stitches, 1 Dc in the next 18 stitches, 2 Dc in the last stitch. 52 stitches.
Row 4: Ch 1, turn. 2 Dc in the 1st stitch, mark the very first stitch, 1 Dc in the next 8 stitches, 1 Htr in the next 7 stitches, 1 Tr in the next 7 stitches, 2 Tr in each of the next 6 stitches, 1 Tr in the next 7 stitches, 1 Htr in the next 7 stitches, 1 Dc in the next 8 stitches, 2 Dc in the last stitch. 60 stitches.
Row 5: Ch 1, turn. 2 Dc in the 1st stitch, mark the very first stitch, 1 Dc in the next 10 stitches, 1 Htr in the next 10 stitches, 1 Tr in the next 18 stitches, 1 Htr in the next 10 stitches, 1 Dc in the next 10 stitches, 2 Dc in the last stitch. Finish row with a slst of colour B. 62 stitches.
Row 6: (With Color B) Ch 2, turn. 1 Htr in the front loop only of the 1st stitch, mark stitch, 1 Htr in the front loops only in each stitch across. Finish row with a slst of colour A. 62 stitches.
Row 7:(With Color A) Ch 1, turn.1 Dc in the 1st stitch, mark stitch, 1 Dc in each stitch across. 62 stitches.
Row 8-10: Repeat row 7, finish the last Dc with Slst with colour B 62 stitches.
RIGHT SANDAL
BUTTON HOLE STRAP
Row 1: With Colour B, Ch 1, Dc in the same stitch, mark stitch, 1 Dc in the next 9 stitches 10 stitches, Ch 17
Row 2: Skip the 1st stitch, 1 Dc in the next chain stitch,1 Dc the remaining 15 chains, 1 Dc in each of the 10 Dc of previous row. 26 stitches.
Row 3: Ch 1, 1 Dc in the 1st stitch and in each stitch till there are 3 stitches remaining, Ch 2, skip 2 stitches, 1 Dc in the last stitch. 26 stitches.
Note: The Ch 2 space is the button hole,
Row 4: Ch 1, 1 Dc in the 1st stitch, mark stitch, 1 Dc in each of the 2 Ch stitches, 1 Dc in each of the remaining stitches of previous row. 26 stitches. Ch 1 and cut yarn. Strap completed.
BUTTON STRAP
Row 1: With Colour B, join yarn with a slst to the other side of the sandal, Ch 1, Dc in the 1st stitch, mark stitch, 1 Dc in the next 9 stitches. 10 stitches.
Row 2: Ch 1, turn, 1 Dc in the 1st stitch, mark stitch, 1 Dc in the next 9 stitches. 10 stitches.
Row 3-4: Repeat row 2. Ch 1 and cut yarn . Strap completed.
LEFT SANDAL
BUTTON STRAP
Row 1: With Colour B, Ch 1, Dc in the 1st stitch, mark stitch, 1 Dc in the next 9 stitches. 10 stitches.
Row 2: Ch 1, turn, 1 Dc in the 1st stitch, mark stitch, 1 Dc in the next 9 stitches. 10 stitches.
Row 3-4: Repeat row 2. Ch 1 and cut yarn . Strap completed.
BUTTON HOLE STRAP
Row 1: With Colour B, join yarn with a slst to the other side of the sandal, Ch 1, Dc in the same stitch, mark stitch, 1 Dc in the next 9 stitches 10 stitches, Ch 17
Row 2: Skip the 1st stitch, 1 Dc in the next chain stitch,1 Dc the remaining 15 chains, 1 Dc in each of the 10 Dc of previous row. 26 stitches.
Row 3: Ch 1, 1 Dc in the 1st stitch and in each stitch till there are 3 stitches remaining, Ch 2, skip 2 stitches, 1 Dc in the last stitch. 26 stitches.
Note: The Ch 2 space is the button hole,
Row 4: Ch 1, 1 Dc in the 1st stitch, mark stitch, 1 Dc in each of the 2 Ch stitches, 1 Dc in each of the remaining stitches of previous row. 26 stitches. Ch 1 and cut yarn. Strap completed.
THE MIDDLE PART
From each strap count 16 stitches and mark the centre 10 stitches.
Row 1: With Colour A, join yarn with a Slst to the stitch before the marked stitch, Ch 1, 1 Dc in each of 10 stitches, replace stitch markers, Slst in the next 2 unworked stitches.
Row 2: Ch 1, 1 Dc in each of the Dc of previous row, skip the stitch that was slipped stitch into in row 1, Slst in the next 2 unworked stitches.
Row 3-14: Ch 1, 1 Dc in each of the Dc of previous row, skip the 2 stitches that was slipped stitch into in previous row, Slst in the next 2 unworked stitches. Ch 1 and cut yarn.
Note: On both sides there will be 2 stitches left unworked.
Reattach Colour A with a slst to 3rd stitch of the last row.
Row 1: Ch 1, 1 Dc in 1st stitch, Dc in each of the next 5 stitches. (6 Dc)
Row 2-11: Ch 1, turn, 1 Dc in 1st stitch, 1 Dc in each of the remaining 5 Dc from previous row. Ch 1 , leave a long tail and cut yarn. Strap completed.
FINISHING
Fold the middle strap in half to the wrong side and sew in place.
Fold the sandals with right side facing and sew up seam, using appropriate colours. Sew up part made with colour A with colour A and part made with colour B with colour B.
Sew buttons in place.
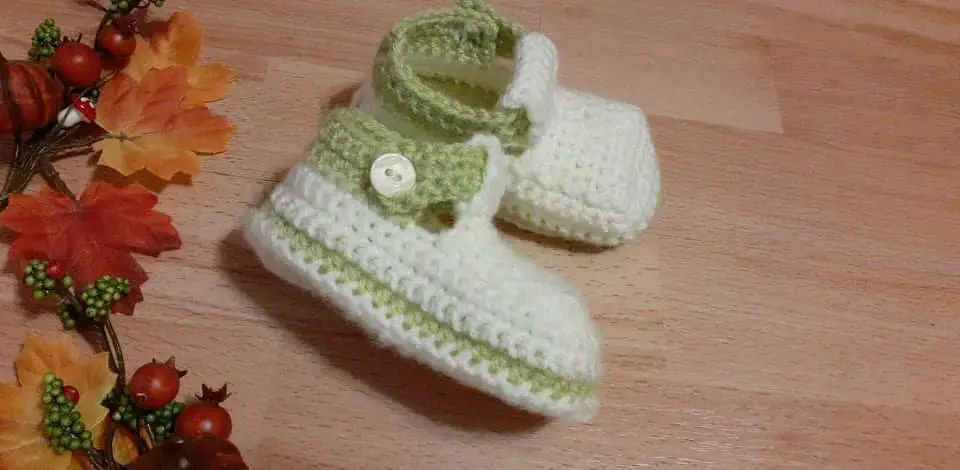
FINISHED SANDALS
DISCLAIMER
All pictures and patterns on toyslabcreations.com is a property of Toyslab Creations. Please do not reprint, publish or post my patterns in whole or in part. Please don’t use my photos to advertise if you use my patterns to make and sell finished items.
Connect with me on Social Media