This post may contain affiliate links. This means that if you make a purchase from those links I receive a commission at no additional cost to you. Thank you for continued support!
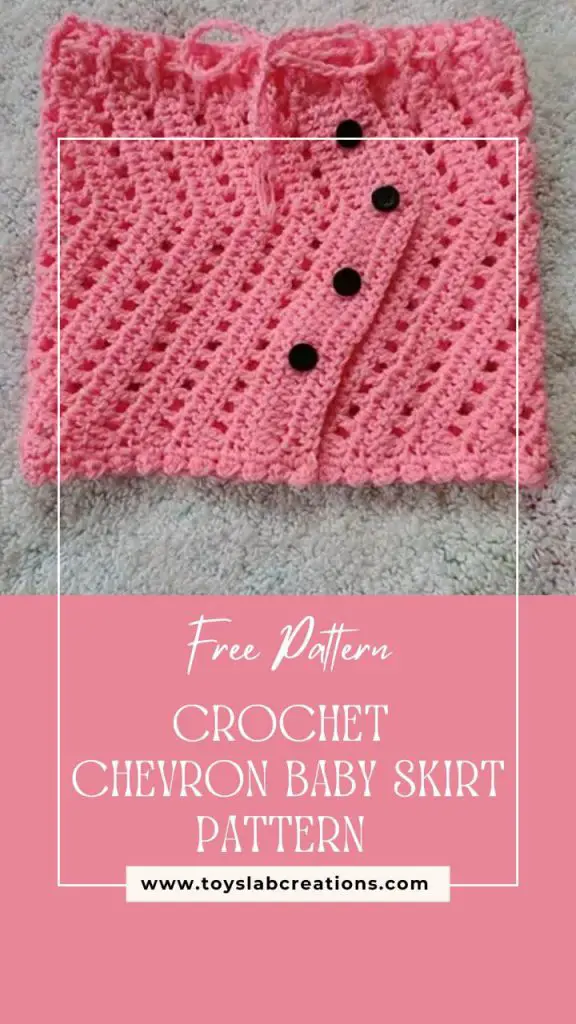
Looking for simple yet adorable crochet baby skirt pattern for your little one? This easy crochet chevron skirt is the answer. It’s a very simple design that uses simple crochet stitches and works up in no time. With this pattern, you can make cute crochet chevron baby skirt. This crochet baby girl skirt pattern will be a great for baby shower gifts and newborn gifts. You can complement the skirt with the chevron headband.
DESIGN
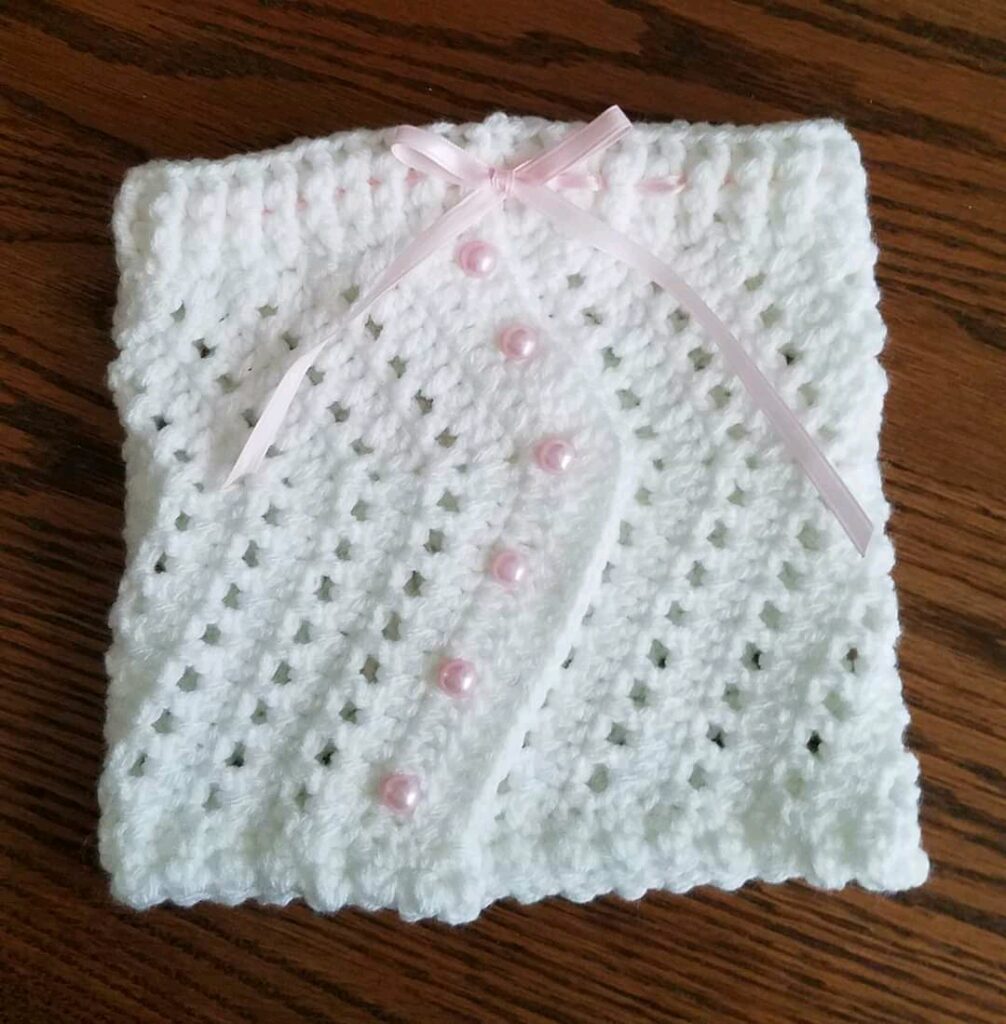
This simple crochet baby skirt pattern uses the chevron stitch in an asymmetrical way and the result is really cute. The skirt is worked sideways. The waist band is then made and then the bottom edging. The buttons are then added and the skirt is all done.
BEGINNER FRIENDLY
This easy crochet baby skirt pattern is very beginner friendly. It uses simple crochet stitches such as Double crochet to achieve this look. It also has a video tutorial to make it easier for visual learners.
YARN
I used light worsted weight yarn for this crochet baby skirt pattern. You can use any light worsted weight yarn of your choice. The skirt has been made in just one color but you can be creative with how you want to mix the colors.
SIZE
In this blog post you will find the instructions for the 0-6 months size of this crochet skirt pattern. The written pdf pattern however contains 13 sizing options from 0-6 months up to 2X adult size.
Read on to find the free crochet pattern for size 0-6 months size below or find the ad-free printable pdf version on Ravelry, Love Crafts, Ko-fi and Etsy.
If you prefer to work with UK terms please scroll further down the page to view the UK version
Video Tutorial
If you prefer video tutorials, you can watch the video tutorial for this crochet buttoned baby skirt above.
Also watch more crochet video tutorials of my patterns on my YouTube channel. Subscribe and turn on notifications so you won’t miss any of my future videos. Happy crocheting!
PDF PATTERN
If you prefer to work offline or if you would like to support my work or you want to make the pattern in bigger sizes, purchase the ad-free printable pdf version, including all photo tutorials on Ravelry, Love Crafts, Ko-fi and Etsy.
Purchase the Ad-Free PDF below
PIN it for later here

Save this pattern to your Ravelry favourites here
Check Out These Other Free Crochet Patterns
Size
0-6 months
Waist Measurement (inches)
17
Skirt Length (inches)
7
Materials
Light worsted weight yarn
4.0 mm crochet hook
Tapestry needle
Scissors
Stitch markers
Stitches (US Version)
Ch: Chain
Dc: Double crochet
Slst: Slip stitch
Inc – increase (1 Dc , Ch 1, 1 Dc in the same stitch)
Dc2tog:Double crochet two together
Fpdc : Front post double crochet
Bpdc: Back post double crochet
Gauge:
16 stitches /8 rows= 10 cm/4 inch square in Dc
Pattern notes
- Ch 1 and Ch 2 at the edges does not count as a stitch
Pattern instructions
Ch 29
Mark the 11th chain from the hook.
Row 1: Dc in the 3rd chain from the hook. Dc in each stitch before the marked stitch. In the marked stitch, 1 Inc (as explained above in the stitches section). Dc in the remaining stitches across the row. 29 stitches.
Row 2: Ch 2, turn. Dc2tog,Dc in each stitch before the peak point. In the Ch 1 space at the peak point, make 1 Inc, Dc in the remaining stitches across the row. Finish the row with Dc2tog. 29 stitches.
Row 3: Ch 2, turn. Dc2tog,Dc in each stitch before the peak point. In the Ch 1 space at the peak point make 1 Inc, Dc in the remaining stitches across the row. Finish the row with Dc2tog. 29 stitches.
Row 4: Ch 2, turn. Dc2tog, *Ch 1, skip 1 stitch, Dc in next* repeat to the peak point. Ch 1, In the Ch 1 space at the peak point make 1 Inc, continue with *Ch 1, skip 1 stitch, Dc in next* finish the row with Ch 1, Dc2tog. 29 stitches.
Row 5: repeat row 3
Row 6: repeat row 4
Row 7 – Row 34 : repeat row 3 and 4
Rows 35 – Row 37: repeat row 3. Ch 1 and cut yarn.
Waist band
Row 1: Place the last 2 rows over the first two rows, insert your hook through both, Ch 2 and make 2 Dc on the side of the 1st stitches placed together,mark first stitch, make 2 Dc also on the side of the second stitches placed together, thereby sewing the skirt together. 2 Dc on the side of each stitch. Slst to the 1st stitch. 70 stitches
Row 2: Ch 2, Fpdc around the post of the first stitch from previous row, Bpdc around the post of the next one. Keep alternating till the end of the row. Finish row with a Bpdc and slst to the 1st stitch. 70 stitches
Row 3: repeat row 2. Ch 1 and cut yarn.
Edging
Row 1: With the right side facing you, reattach yarn with a slst to the edge of the skirt, Ch 1 make 3 Sc on the side of the first stitch, mark first stitch, make 2 Sc on the side of each stitch across, make 3 Sc on the side of the last stitch
Row 2: Ch 2, turn. Dc in first stitch and slst in the next, repeat across row. Ch 1 and cut yarn.
Make a long chain and pass it through the waistband.
Attach button at the peak point of the first row of the project. Place other buttons at intervals that best suits you.
Button up through the 2nd to the last row of the project, through the spaces between the Dc.
Finished project

UK VERSION
Size
0-6 months
Waist Measurement (inches)
17
Skirt Length (inches)
7
Materials
Light worsted weight yarn
4.0 mm crochet hook
Tapestry needle
Scissors
Stitch markers
Stitches (UK Version)
Ch: Chain
Dc: Double crochet
Tr: Treble crochet
Slst: Slip stitch
Inc – increase (1 Tr , Ch 1, 1 Tr in the same stitch)
Tr2tog: Treble crochet two together
Fptr : Front post treble crochet
Bptr: Back post treble crochet
Gauge:
16 stitches /8 rows= 10 cm/4 inch square in Tr
Pattern notes
Ch 1 and Ch 2 at the edges does not count as a stitch
Pattern instructions
Ch 29
Mark the 11th chain from the hook.
Row 1: Tr in the 3rd chain from the hook. Tr in each stitch before the marked stitch. In the marked stitch, 1 Inc (as explained above in the stitches section). Tr in the remaining stitches across the row. 29 stitches.
Row 2: Ch 2, turn. Tr2tog,Tr in each stitch before the peak point. In the Ch 1 space at the peak point, make 1 Inc, Tr in the remaining stitches across the row. Finish the row with Tr2tog. 29 stitches.
Row 3: Ch 2, turn. Tr2tog,Tr in each stitch before the peak point. In the Ch 1 space at the peak point make 1 Inc, Tr in the remaining stitches across the row. Finish the row with Tr2tog. 29 stitches.
Row 4: Ch 2, turn. Tr2tog, Ch 1, skip 1 stitch, Tr in next repeat to the peak point. Ch 1, In the Ch 1 space at the peak point make 1 Inc, continue with Ch 1, skip 1 stitch, Tr in next finish the row with Ch 1, Tr2tog. 29 stitches.
Row 5: repeat row 3
Row 6: repeat row 4
Row 7 – Row 34 : repeat row 3 and 4
Rows 35 – Row 37: repeat row 3. Ch 1 and cut yarn.
Waist band
Row 1: Place the last 2 rows over the first two rows, insert your hook through both, Ch 2 and make 2 Tr on the side of the 1st stitches placed together,mark first stitch, make 2 Tr also on the side of the second stitches placed together, thereby sewing the skirt together. 2 Tr on the side of each stitch. Slst to the 1st stitch. 70 stitches
Row 2: Ch 2, Fptr around the post of the first stitch from previous row, Bptr around the post of the next one. Keep alternating till the end of the row. Finish row with a Bptr and slst to the 1st stitch. 70 stitches
Row 3: repeat row 2. Ch 1 and cut yarn.
Edging
Row 1: With the right side facing you, reattach yarn with a slst to the edge of the skirt, Ch 1 make 3 Dc on the side of the first stitch, mark first stitch, make 2 Dc on the side of each stitch across, make 3 Dc on the side of the last stitch
Row 2: Ch 2, turn. Tr in first stitch and slst in the next, repeat across row. Ch 1 and cut yarn.
Make a long chain and pass it through the waistband.
Attach button at the peak point of the first row of the project. Place other buttons at intervals that best suits you.
Button up through the 2nd to the last row of the project, through the spaces between the Tr.
Finished project

Disclaimer:
All patterns and pictures on toyslabcreations.com is a property of Toyslab Creations. Please do not reprint, publish or post my patterns in whole or in part. Please don’t use my photos to advertise if you use my patterns to make and sell finished items.
Connect with me on Social Media


