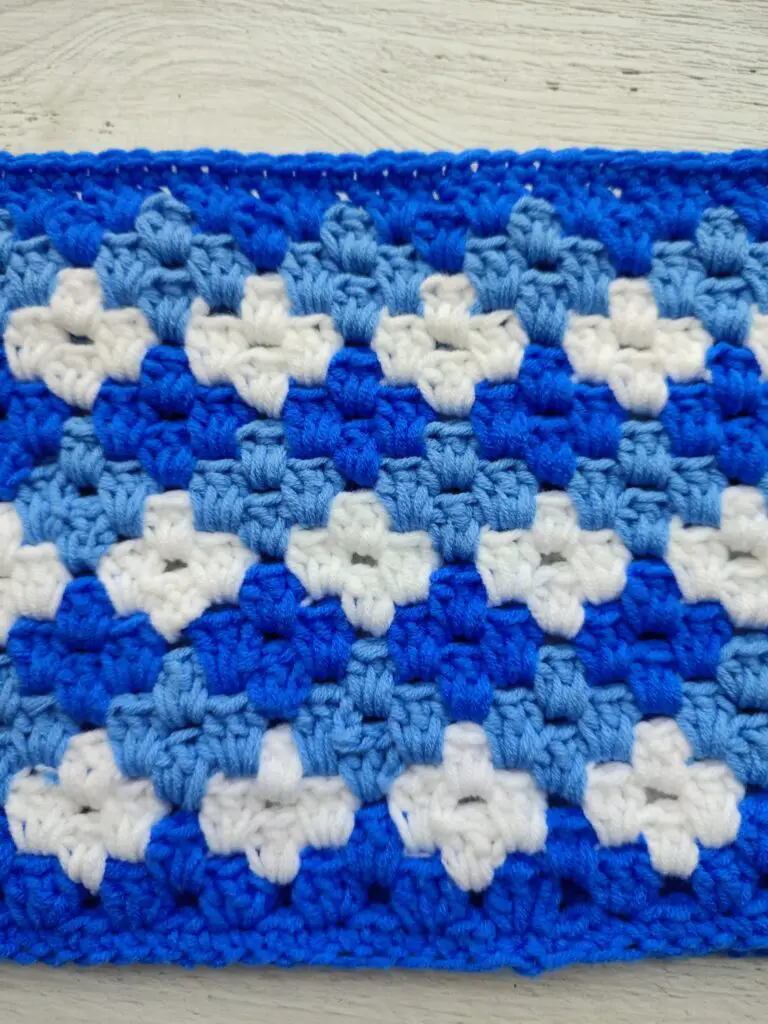
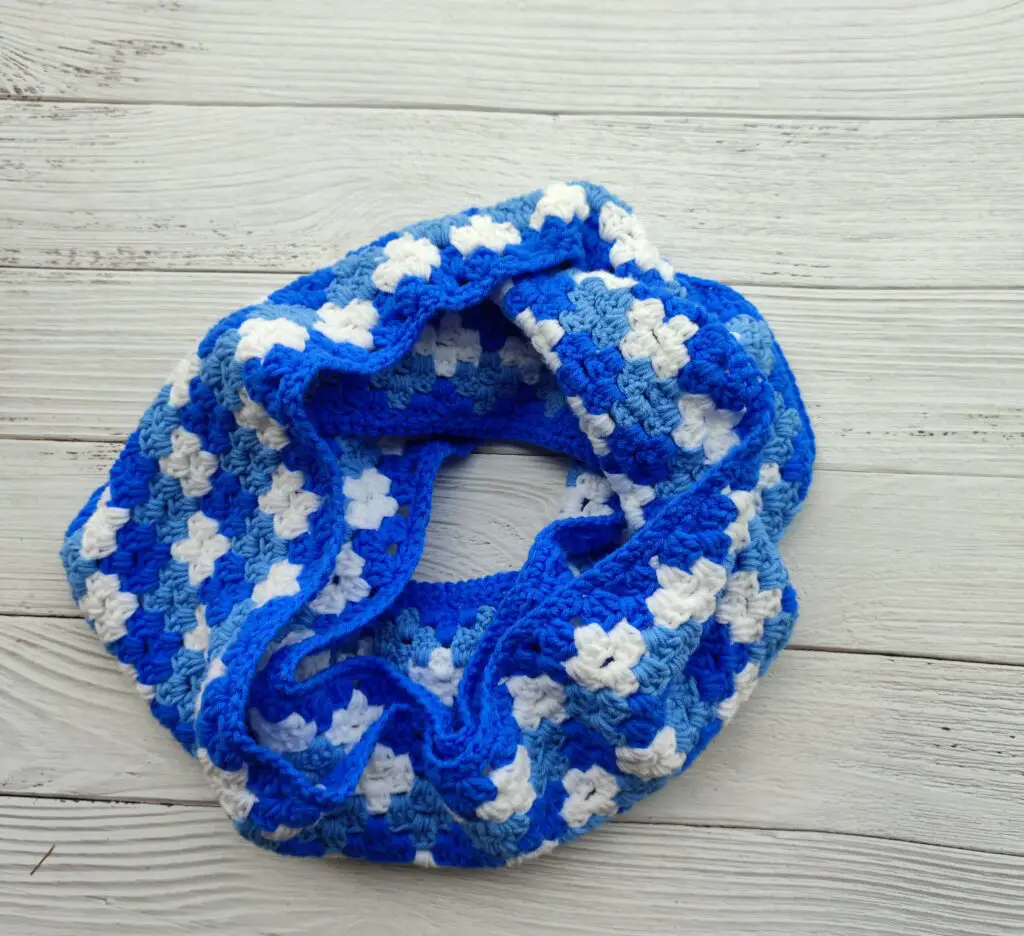
Looking for a beautiful and colorful crochet scarf for cold days? This easy beginner friendly crochet scarf is just perfect. I love how the colors mix to form the diamond shape. Make this beautiful crochet granny diamond infinity scarf for yourself or as a gift for loved ones. Follow this easy crochet pattern and get ready for the winter season with this warm, stylish and colorful crochet infinity scarf.
DESIGN
This crochet infinity scarf is worked in rounds. The beautiful design starts once you start working with the third color. This crochet infinity scarf is worked in just 21 rounds!
BEGINNER FRIENDLY
The Crochet granny diamond Infinity scarf is very beginner friendly, as granny stitch is one of the basic crochet stitches that beginners learn, it is beginner friendly and the color changes are not much of a hassle. It’s a fun and colorful project.
FAST AND EASY
This crochet infinity scarf works up pretty fast and it’s an easy project to make. Once you get the hang of changing the colors, it gets pretty easy.
YARN
I used worsted weight yarn for this easy crochet infinity scarf pattern. You can use any worsted weight yarn of your choice.
SIZE
The crochet infinity scarf pattern has only one size. You can find free crochet pattern below.
MAKE IT YOUR OWN
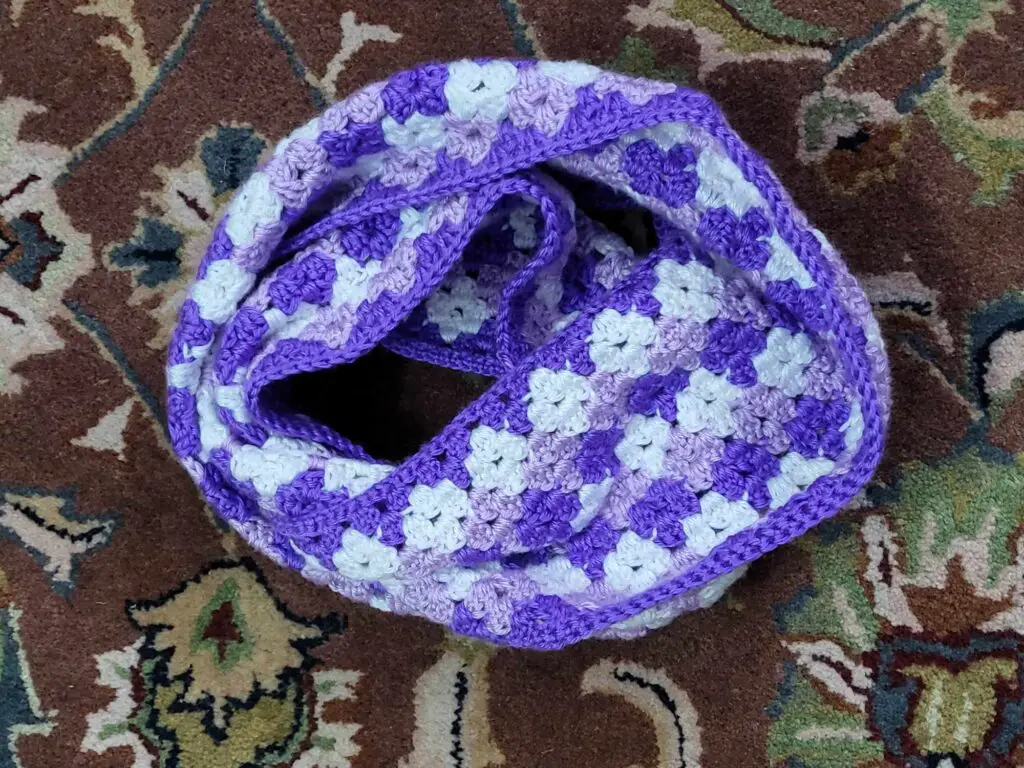
You can make this easy crochet infinity scarf pattern in any circumference, take note that you have to have multiple of 6 stitches, you can increase or decrease the height, you can use more than 3 colors if you prefer, I just love how the three colors came together
Read on to find the free version of the Crochet granny Diamond infinity scarf pattern below in both US and UK terms. You can find the UK instructions after the US instructions. Please scroll further down if you prefer to work in UK terms. You can also find the ad-free printable PDF version in Ravelry, Love Crafts, Ko-fi and Etsy Shops.
PDF PATTERN
If you prefer to work offline or if you would like to support my work, purchase the ad-free printable pdf version, including all photo tutorials on Ravelry, Love Crafts, Ko-fi and Etsy.
Purchase the Ad-Free PDF below


PIN it for later here
Save this pattern to your Ravelry favourite here
Check Out These Other Free Crochet Patterns
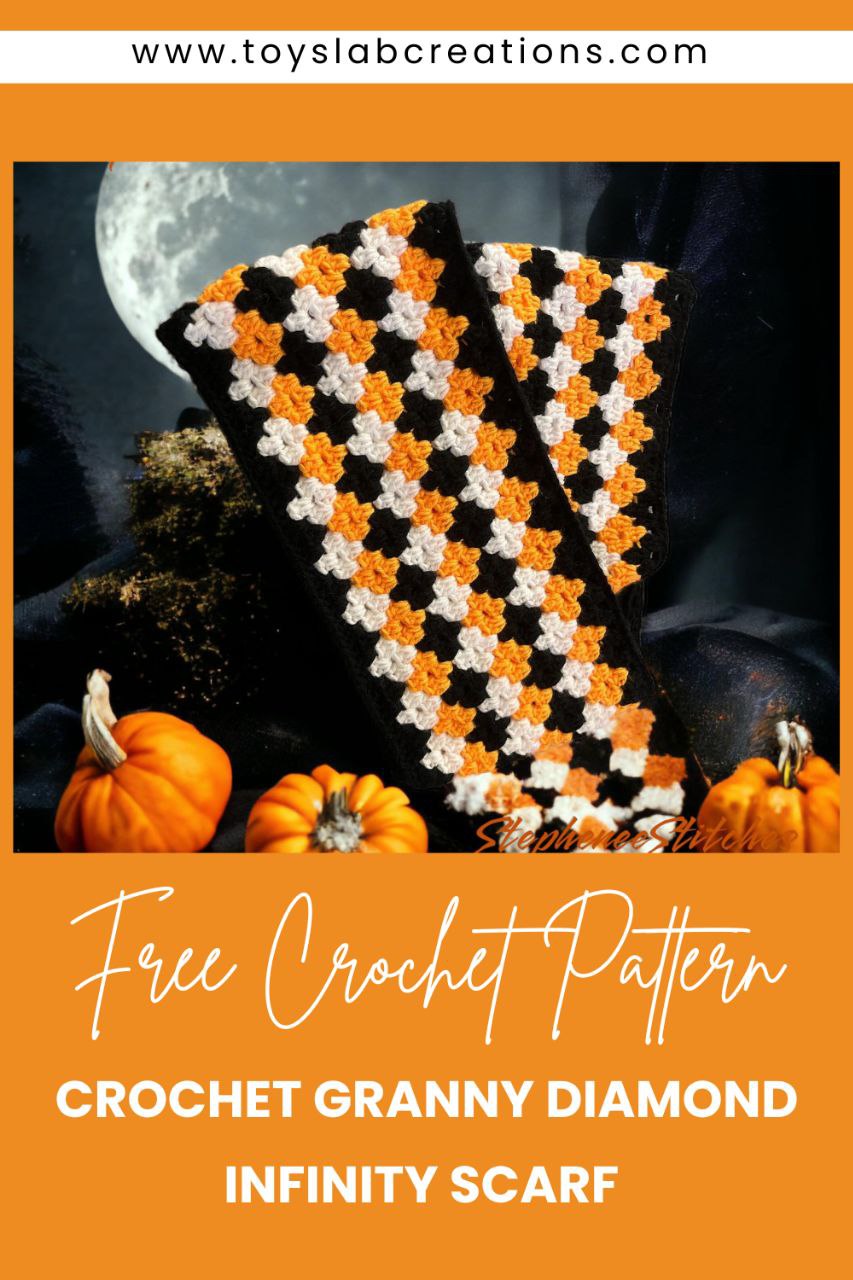
CROCHET GRANNY DIAMOND INFINITY SCARF
Measurement
68 inches circumference, 7.5 inches height
Materials:
5.0 mm crochet hook
Worsted weight yarn – 350g
Colour A = 150g
Colour B = 100g
Colour C =100g
Stitch marker (Optional)
Yarn needle
Difficulty:
Advanced Beginner
Gauge :
13 Sc stitches/10 Granny Stitch rows = 10 cm/4 inches
Stitch Guide (US Version)
Ch: Chain
Sc: Single Crochet
Slst: Slip stitch
Dc: Double Crochet
Pattern notes
Ch 1 at the beginning of the row does not count as a stitch
Ch 3 at the beginning of the row counts as a stitch.
The scarf is worked in rounds.
The scarf is 68 inches in circumference, if you want to reduce length to your scarf, you can make less starting chains in multiples of 6.
The final measurement of your scarf may differ as the pattern is very dependent on your tension.
Weave in your ends as you go to have a neater scarf
Pattern Instructions:
With colour A
Ch 228, join in the round with a slst. make sure you don’t twist when you joining in the round.
Round 1: Ch 1, Sc in the first chain, mark stitch. Sc in each stitch around. Finish the round with a slip stitch to the first stitch of the round. (228 Sc)
Round 2: Ch 3, mark the third chain, 2 Dc in the first stitch, Skip 2 stitches, 3 Dc in the next stitch Repeat all the way around. Finish the round with a slip stitch in the first stitch of the round. Ch 1 and cut yarn. (76 A clusters)
Round 3: With colour B,make a slip knot and attach the new yarn with a Slst to the next space. Ch 3, mark the third chain, 2 Dc in the same space, finish the last Dc with a slip stitch of colour A, make 3 Dc in the next space, finish the last Dc with a slip stitch of colour B,make 3 Dc in the next space, finish the last Dc with a slip stitch of colour A repeat all the way around. Finish the last Dc with a slst of colors B. Finish the round with a slip stitch in the first stitch of the round. Ch 1 and cut colour A (38 B, 38 A clusters)
Round 4: With colour B, Slst in the next stitches to reach the next space between clusters.Ch 3, mark the third chain and make 2 more Dc in the same space,, 3 Dc in the next space Repeat all the way around. Finish the round with a slip stitch in the first stitch of the round. Ch 1 and cut yarn. (76 B clusters)
Round 5: With colour C, make a slip knot and attach the new yarn with a Slst to the next space. Ch 3, mark the third chain, 2 Dc in the same space, finish the last Dc with a slip stitch of colour B, make 3 Dc in the next space, finish the last Dc with a slip stitch of colour C,make 3 Dc in the next space, finish the last Dc with a slip stitch of colour B repeat all the way around. Finish the last Dc with a slst of colour C. Finish the round with a slip stitch in the first stitch of the round. Ch 1 and cut colour B. (38 C, 38 B clusters)
Round 6: With colour C, Slst in the next stitches to reach the next space between clusters.Ch 3, mark the third chain and make 2 more Dc in the same space,, 3 Dc in the next space Repeat all the way around. Finish the round with a slip stitch in the first stitch of the round. Ch 1 and cut yarn. (76 C clusters)
Round 7: With colour A, make a slip knot and attach the new yarn with a Slst to the next space. Ch 3, mark the third chain, 2 Dc in the same space, finish the last Dc with a slip stitch of colour C, make 3 Dc in the next space, finish the last Dc with a slip stitch of colour A,make 3 Dc in the next space, finish the last Dc with a slip stitch of colour C repeat all the way around. Finish the last Dc with a slst of colour A. Finish the round with a slip stitch in the first stitch of the round. Ch 1 and cut colour C. (38 A, 38 C clusters)
Round 8: With colour A, Slst in the next stitches to reach the next space between clusters.Ch 3, mark the third chain and make 2 more Dc in the same space,, 3 Dc in the next space Repeat all the way around. Finish the round with a slip stitch in the first stitch of the round. Ch 1 and cut yarn. (76 A clusters)
Round 9: Repeat round 3
Round 10: Repeat round 4
Round 11: Repeat round 5
Round 12: Repeat round 6
Round 13: Repeat round 7
Round 14: Repeat round 8
Round 15: Repeat round 3
Round 16: Repeat round 4
Round 17: Repeat round 5
Round 18: Repeat round 6
Round 19: Repeat round 7
Round 20: Repeat round 8
Round 21: Ch 1, Sc in the first stitch, mark stitch. Sc in each stitch around. Finish the round with a slip stitch to the first stitch of the round. Ch 1 and cut yarn. (228 Sc)
Finishing
Weave in all ends.
Finished Project
UK VERSION
Crochet Granny Diamond Infinity Scarf
Measurement
68 inches circumference, 7.5 inches height
Materials:
5.0 mm crochet hook
Worsted weight yarn – 350g
Colour A = 150g
Colour B = 100g
Colour C =100g
Stitch marker (Optional)
Yarn needle
Difficulty:
Advanced Beginner
Gauge :
13 Dc stitches/10 Granny Stitch rows = 10 cm/4 inches
Stitch Guide (UK Version)
Ch: Chain
Dc: Double Crochet
Slst: Slip stitch
Tr: Treble Crochet
Pattern notes
- Ch 1 at the beginning of the row does not count as a stitch
- Ch 3 at the beginning of the row counts as a stitch.
- The Dcarf is worked in rounds.
- The Dcarf is 68 inches in circumference, if you want to reduce length to your Dcarf, you can make less starting chains in multiples of 6.
- The final measurement of your Dcarf may differ as the pattern is very dependent on your tension.
- Weave in your ends as you go to have a neater Dcarf
Pattern Instructions:
With colour A
Ch 228, join in the round with a slst. make sure you don’t twist when you joining in the round.
Round 1: Ch 1, Dc in the first chain, mark stitch. Dc in each stitch around. Finish the round with a slip stitch to the first stitch of the round. (228 Dc)
Round 2: Ch 3, mark the third chain, 2 Tr in the first stitch, Skip 2 stitches, 3 Tr in the next stitch Repeat all the way around. Finish the round with a slip stitch in the first stitch of the round. Ch 1 and cut yarn. (76 A clusters)
Round 3: With colour B,make a slip knot and attach the new yarn with a Slst to the next space. Ch 3, mark the third chain, 2 Tr in the same space, finish the last Tr with a slip stitch of colour A, make 3 Tr in the next space, finish the last Tr with a slip stitch of colour B,make 3 Tr in the next space, finish the last Tr with a slip stitch of colour A repeat all the way around. Finish the last Tr with a slst of colors B. Finish the round with a slip stitch in the first stitch of the round. Ch 1 and cut colour A (38 B, 38 A clusters)
Round 4: With colour B, Slst in the next stitches to reach the next space between clusters.Ch 3, mark the third chain and make 2 more Tr in the same space,, 3 Tr in the next space Repeat all the way around. Finish the round with a slip stitch in the first stitch of the round. Ch 1 and cut yarn. (76 B clusters)
Round 5: With colour C, make a slip knot and attach the new yarn with a Slst to the next space. Ch 3, mark the third chain, 2 Tr in the same space, finish the last Tr with a slip stitch of colour B, make 3 Tr in the next space, finish the last Tr with a slip stitch of colour C,make 3 Tr in the next space, finish the last Tr with a slip stitch of colour B repeat all the way around. Finish the last Tr with a slst of colour C. Finish the round with a slip stitch in the first stitch of the round. Ch 1 and cut colour B. (38 C, 38 B clusters)
Round 6: With colour C, Slst in the next stitches to reach the next space between clusters.Ch 3, mark the third chain and make 2 more Tr in the same space,, 3 Tr in the next space Repeat all the way around. Finish the round with a slip stitch in the first stitch of the round. Ch 1 and cut yarn. (76 C clusters)
Round 7: With colour A, make a slip knot and attach the new yarn with a Slst to the next space. Ch 3, mark the third chain, 2 Tr in the same space, finish the last Tr with a slip stitch of colour C, make 3 Tr in the next space, finish the last Tr with a slip stitch of colour A,make 3 Tr in the next space, finish the last Tr with a slip stitch of colour C repeat all the way around. Finish the last Tr with a slst of colour A. Finish the round with a slip stitch in the first stitch of the round. Ch 1 and cut colour C. (38 A, 38 C clusters)
Round 8: With colour A, Slst in the next stitches to reach the next space between clusters.Ch 3, mark the third chain and make 2 more Tr in the same space,, 3 Tr in the next space Repeat all the way around. Finish the round with a slip stitch in the first stitch of the round. Ch 1 and cut yarn. (76 A clusters)
Round 9: Repeat round 3
Round 10: Repeat round 4
Round 11: Repeat round 5
Round 12: Repeat round 6
Round 13: Repeat round 7
Round 14: Repeat round 8
Round 15: Repeat round 3
Round 16: Repeat round 4
Round 17: Repeat round 5
Round 18: Repeat round 6
Round 19: Repeat round 7
Round 20: Repeat round 8
Round 21: Ch 1, Dc in the first stitch, mark stitch. Dc in each stitch around. Finish the round with a slip stitch to the first stitch of the round. Ch 1 and cut yarn. (228 Dc)
Finishing
Weave in all ends.
Finished Project
Disclaimer
All patterns and pictures on this Website is a property of Toyslab Creations. Please do not reprint, publish or post my patterns in whole or in part. Please don’t use my photos to advertise if you use my patterns to make and sell finished items.
Connect with me on Social Media