
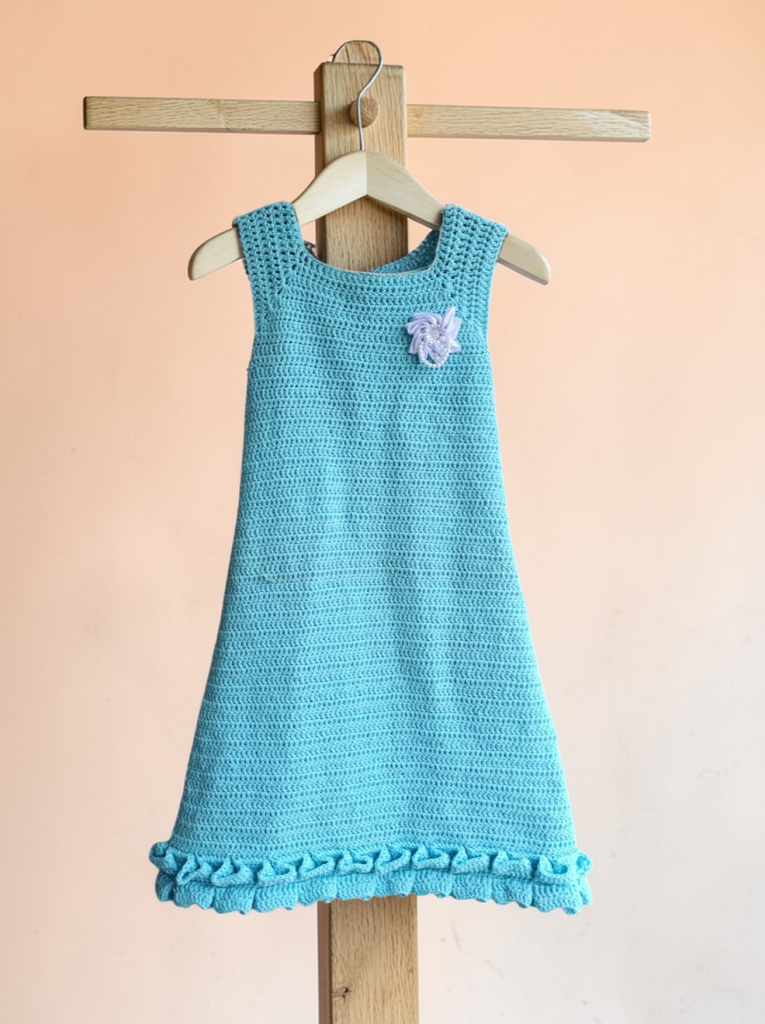
Looking for a simple yet gorgeous crochet baby dress pattern? Look no further, The Crochet pleated A-line dress is the answer. It’s looks very simple and basic but the pleat detailing adds a lot of beauty to it. It definitely makes a cute crochet baby gift.
DESIGN
The crochet pleated A-line baby dress pattern is worked top down starting with the yoke and then starts getting wider at the sides to achieve the A-line shape, the upper and lower pleats are the made at the hem of the dress, then the back opening is then closed with zipper or buttons, if you prefer, and finally, add any embellishments of your choice and your adorable crochet baby A-line dress is ready!
SIMPLE AND CUTE
The crochet A-line baby girl dress is very simple to make as it makes use of mainly double crochet stitch, the A-line shape adds to its beauty and then pleats crowns it all.
NO SEW PLEAT
The pleats are no sew, you just make it as you go along with easy to follow instructions. Even the upper pleat is even sewn down as you go, so you don’t have to use Tapestry needle for that as well. It’s quite easy to make once you you get the hang of it.
YARN
I used two strands of fingering weight yarn to achieve a Dk weight for this crochet baby dress pattern, you can use any Dk weight yarn of your choice. You can use scrap yarns, cake yarn with multiple color gradients. Which every option you choose, I’m sure it will turn out cute!
SIZES
The crochet pleated A-line baby dress has six sizing options, 0-12(1-2,3-4,5-6,7-8,9-10) years. This blog post contains instructions for size 0-12 months.
Read on to find the free crochet baby A-line dress pattern below or find the ad-free printable PDF version on Ravelry, Love Crafts, Ko-fi and Etsy.
If you prefer to work with UK terms please scroll further down the page to view the UK version.
PDF PATTERN
If you prefer to work offline or if you would like to support my work, purchase the ad-free printable pdf version, including all photo tutorials on Ravelry, Love Crafts, Ko-fi and Etsy.
Purchase the Ad-Free PDF below




PIN it for later here
Save this pattern to your Ravelry favourite here
Check Out These Other Free Crochet Patterns
US VERSION
CROCHET PLEATED A-LINE BABY DRESS | FREE PATTERN
Materials:
4.0 mm crochet hook
Dk weight yarn – 1500 meters
Zipper
Stitch markers (Optional)
Yarn needle
Difficulty:
Intermediate
Gauge:
15 stitches /9 rows= 10 cm/4 inch square in Dc
Stitches (US Version):
Ch: Chain
Sc: Single Crochet
Dc: Double Crochet
Slst: Slip Stitch
Flo: Front Loop Only
Blo: Back loop Only
Pattern Notes:
- Ch 2 at the beginning of the row does not count as a stitch.
- The dress is worked top down.
- First row is the right side of the project.
- When we start making increases on both sides of the dress to form the A shape, we increase on one row/round, no increases on the next two rows/rounds
- When working in the round, start with Ch 2, turn. Then continue working your round. This is to achieve a straight back seam, so we turn at the beginning of each round.
- The first row of the project is used to determine the right side.
Pattern Instructions:
Ch 54
Row 1: Skip 2 chains, Dc in the 3rd chain from the hook, Dc in each stitch across. 52 Dc
Row 2: Ch 2, turn. Dc 7 {2 Dc, Ch 1, 2 Dc} all in the next stitch, Dc 10 {2 Dc , Ch 1, 2 Dc} all in the next stitch, Dc 14 {2 Dc , Ch 1, 2 Dc} all in the next stitch, Dc 10, {2 Dc , Ch 1, 2 Dc} all in the next stitch, Dc 7. 64 Dc
Row 3: Ch 2, turn. Dc 9 {2 Dc, Ch 1, 2 Dc} all in the next stitch, Dc 14 {2 Dc , Ch 1, 2 Dc} all in the next stitch, Dc 18 {2 Dc , Ch 1, 2 Dc} all in the next stitch, Dc 14, {2 Dc , Ch 1, 2 Dc} all in the next stitch, Dc 9. 80 Dc
Row 4: Ch 2, turn. Dc 11 {2 Dc, Ch 1, 2 Dc} all in the next stitch, Dc 18 {2 Dc , Ch 1, 2 Dc} all in the next stitch, Dc 22 {2 Dc , Ch 1, 2 Dc} all in the next stitch, Dc 18, {2 Dc , Ch 1, 2 Dc} all in the next stitch, Dc 11. 96 Dc
Row 5: Ch 2, turn. Dc 13 {2 Dc, Ch 1, 2 Dc} all in the next stitch, Dc 22 {2 Dc , Ch 1, 2 Dc} all in the next stitch, Dc 26 {2 Dc , Ch 1, 2 Dc} all in the next stitch, Dc 22 {2 Dc , Ch 1, 2 Dc} all in the next stitch, Dc 13. 112 Dc
Joining sleeves
Row 6: Ch 2, turn. Dc 15, Dc in the Ch 1 space, skip the next 26 stitches, fold bodice to make Ch 1 space match evenly with the next Ch 1 space, Ch 2Dc in the next Ch 1 Space, Dc in the next 30, Dc in the next Ch 1 space, skip the next 26 stitches, fold bodice to make Ch 1 space match evenly with the next Ch 1 space, Ch 2, Dc in the next Ch 1 Space, Dc in the last 15 stitches. 68 stitches.
Note:
Ch 2 worked into the armhole when making the arm holes on row 6 counts as stitches.
Row 7: Ch 2, turn. Dc in the first stitch, mark stitch, Dc in each stitch across including the Ch 2 at the armhole. (mark each of the 2 stitches at both armhole as it is where we will be increasing) 68 Dc.
Row 8: Ch 2, turn. Dc in the first stitch, mark stitch. Dc in each stitch until the 2 marked stitches at the armhole. 2 Dc in each of them, mark the 2nd stitch of the first increase, and the first stitch of the 2nd increase, such that the stitch markers are next to each other. Continue with Dc in each stitch until you get to the next marked stitches, repeat same, Dc in each of the remaining stitches of the row. 72 Dc
Row 9: Ch 2, turn. Dc in the first stitch, Dc in each stitch across. When you get to the marked stitches at the armhole, make sure to move the stitch markers to the current row. 72 Dc
Row 10: Ch 2, turn. Dc in the first stitch, Dc in each stitch across. When you get to the marked stitches at the armhole, make sure to move the stitch markers to the current row. 72 Dc
Row 11: Ch 2, turn. Dc in the first stitch, mark stitch. Dc in each stitch until the 2 marked stitches at the armhole. 2 Dc in each of them, mark the 2nd stitch of the first increase, and the first stitch of the 2nd increase, such that the stitch markers are next to each other. Continue with Dc in each stitch until you get to the next marked stitches, repeat same, Dc in each of the remaining stitches of the row. 76 Dc
Row 12: Ch 2, Dc in the first stitch, mark stitch, Dc in each stitch across.(remember to move up the stitch markers) Finish row 12 with a slst to the first stitch.
We start working in the round from round 13
Round 13: Ch 2, turn. Dc in the first stitch, Dc in each stitch around. When you get to the marked stitches at the armhole, make sure to move the stitch markers to the current row. Slst to the first stitch of the round. 76 Dc
Round 14: Ch 2, turn. Dc in the first stitch, mark stitch. Dc in each stitch until the 2 marked stitches at the armhole. 2 Dc in each of them, mark the 2nd stitch of the first increase, and the first stitch of the 2nd increase, such that the stitch markers are next to each other. Continue with Dc in each stitch until you get to the next marked stitches, repeat same, Dc in each of the remaining stitches of the round. Slst to the first stitch of the round. 80 Dc
Round 15: Ch 2, turn. Dc in the first stitch, Dc in each stitch around. When you get to the marked stitches at the armhole, make sure to move the stitch markers to the current row. Slst to the first stitch of the round. 80 Dc
Round 16: Ch 2, turn. Dc in the first stitch, Dc in each stitch around. When you get to the marked stitches at the armhole, make sure to move the stitch markers to the current row. Slst to the first stitch of the round. 80 Dc
Rounds 17 – 40: Repeat Rounds 14-16. Ending with a repeat of round 16
Make sure your project is on the right side
Round 41: Ch 2, turn. Dc in Blo of each stitch around.
Round 42: Ch 2, turn. Dc in each stitch around. Ch 1 and cut yarn.
Pleat
Attach yarn to the unworked loop from two rounds above. Ch 1, Slst loosely in each stitch around, Slst to the first stitch of the round. 112(128,144,160,176,192) stitches
Note: We don’t turn for the rounds here
Round 1: Ch 1, Sc in the Blo of the first stitch, Sc in Blo in each stitch around. Slst to the first stitch of the round. 112 stitches
Round 2: Ch 2 *Dc 4 in Blo, Dc 4 in Blo of the same stitches, Dc 4 in Flo of the same stitches, Dc in the Flo of the next 4, Dc 4 in Blo of the same stitches, Dc 4 in Blo of the same stitches* repeat 14 times. Finish the round with a slst to the first stitch of the round. 336 Dc
Round 3: Ch 2, Dc in the first stitch, mark stitch, Dc in each stitch around. Ch 1 and cut yarn. 336 Dc
The upper pleat
Attach yarn to the unworked loop of the slst round
Working in the opposite direction so that the right side of the work is facing up,
Round 1: Ch 1, Sc in the of the first stitch, Sc in each stitch around. Slst to the first stitch of the round. 112 stitches
Round 2: Ch 2 *Dc 4 in Blo, Dc 4 in Blo of the same stitches, Dc 4 in Flo of the same stitches, Dc in the Flo of the next 4, Dc 4 in Blo of the same stitches, Dc 4 in Blo of the same stitches* repeat 14 times. Finish the round with a slst to the first stitch of the round. 336 Dc
Round 3: Ch 2, In the first stitch, make Dc until you have two loop on your hook, insert your hook into the base of the fourth row above, yarn over and pull through all (we have “sewn” down the stitch, mark stitch, in the next stitch, *make Dc until you have two loop on your hook, insert your hook into the base of the fourth row above, yarn over and pull through all* Repeat for next 2 stitches. *Dc in next 16 stitches, “Sew” the next 8 stitches* Repeat around, finish row with “sewing” down the last 4 stitches, Slst to the first stitch of the round. Ch 1 and cut yarn. 336 Dc
Watch this short clip on Youtube showing how to “sew down” the pleats
Finishing
Attach a zipper to the back of the dress
Weave in all ends
Attach any embellishment of your choice.
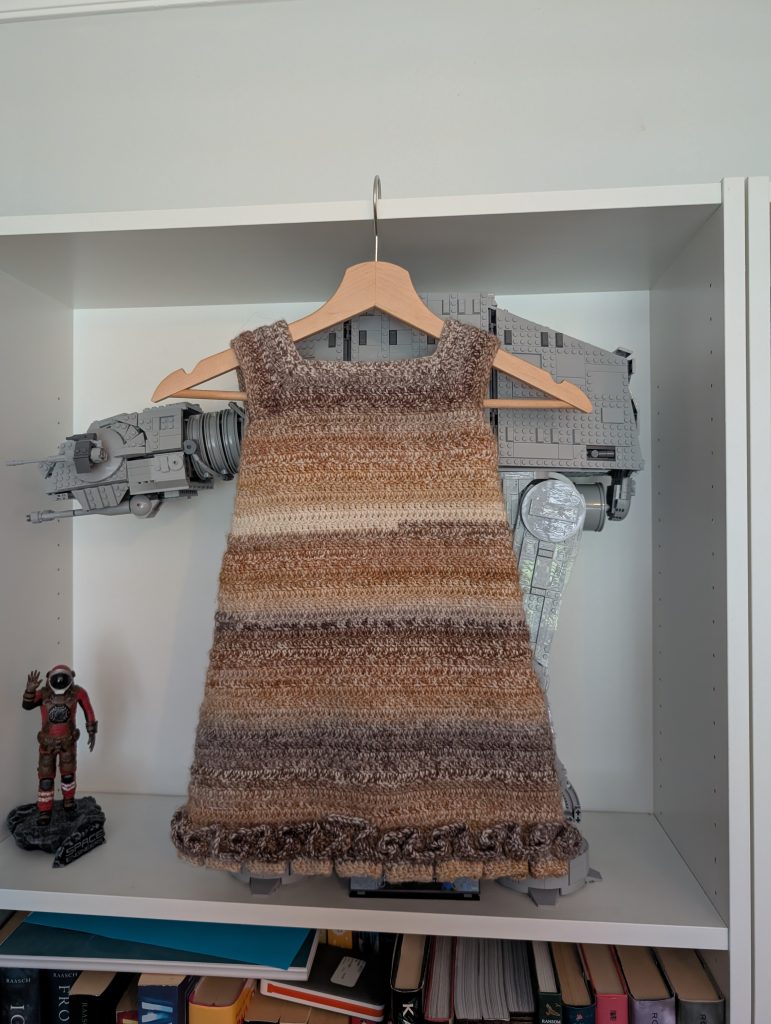
Finished Project
UK VERSION
CROCHET PLEATED A-LINE BABY DRESS | FREE PATTERN
Materials:
4.0 mm crochet hook
Dk weight yarn – 1500 meters
Zipper
Stitch markers (Optional)
Yarn needle
Difficulty:
Intermediate
Gauge:
15 stitches /9 rows= 10 cm/4 inch square in Tr
Stitches (UK Version):
Ch: Chain
Dc: Single Crochet
Tr: Double Crochet
SS: Slip Stitch
Flo: Front Loop Only
Blo: Back loop Only
Pattern Notes:
- Ch 2 at the beginning of the row does not count as a stitch.
- The dress is worked top down.
- First row is the right side of the project.
- When we start making increases on both sides of the dress to form the A shape, we increase on one row/round, no increases on the next two rows/rounds
- When working in the round, start with Ch 2, turn. Then continue working your round. This is to achieve a straight back seam, so we turn at the beginning of each round.
- The first row of the project is used to determine the right side.
Pattern Instructions:
Ch 54
Row 1: Skip 2 chains, Tr in the 3rd chain from the hook, Tr in each stitch across. 52 Tr
Row 2: Ch 2, turn. Tr 7 {2 Tr, Ch 1, 2 Tr} all in the next stitch, Tr 10 {2 Tr , Ch 1, 2 Tr} all in the next stitch, Tr 14 {2 Tr , Ch 1, 2 Tr} all in the next stitch, Tr 10, {2 Tr , Ch 1, 2 Tr} all in the next stitch, Tr 7. 64 Tr
Row 3: Ch 2, turn. Tr 9 {2 Tr, Ch 1, 2 Tr} all in the next stitch, Tr 14 {2 Tr , Ch 1, 2 Tr} all in the next stitch, Tr 18 {2 Tr , Ch 1, 2 Tr} all in the next stitch, Tr 14, {2 Tr , Ch 1, 2 Tr} all in the next stitch, Tr 9. 80 Tr
Row 4: Ch 2, turn. Tr 11 {2 Tr, Ch 1, 2 Tr} all in the next stitch, Tr 18 {2 Tr , Ch 1, 2 Tr} all in the next stitch, Tr 22 {2 Tr , Ch 1, 2 Tr} all in the next stitch, Tr 18, {2 Tr , Ch 1, 2 Tr} all in the next stitch, Tr 11. 96 Tr
Row 5: Ch 2, turn. Tr 13 {2 Tr, Ch 1, 2 Tr} all in the next stitch, Tr 22 {2 Tr , Ch 1, 2 Tr} all in the next stitch, Tr 26 {2 Tr , Ch 1, 2 Tr} all in the next stitch, Tr 22 {2 Tr , Ch 1, 2 Tr} all in the next stitch, Tr 13. 112 Tr
Joining sleeves
Row 6: Ch 2, turn. Tr 15, Tr in the Ch 1 space, skip the next 26 stitches, fold bodice to make Ch 1 space match evenly with the next Ch 1 space, Ch 2Tr in the next Ch 1 Space, Tr in the next 30, Tr in the next Ch 1 space, skip the next 26 stitches, fold bodice to make Ch 1 space match evenly with the next Ch 1 space, Ch 2, Tr in the next Ch 1 Space, Tr in the last 15 stitches. 68 stitches.
Note:
Ch 2 worked into the armhole when making the arm holes on row 6 counts as stitches.
Row 7: Ch 2, turn. Tr in the first stitch, mark stitch, Tr in each stitch across including the Ch 2 at the armhole. (mark each of the 2 stitches at both armhole as it is where we will be increasing) 68 Tr.
Row 8: Ch 2, turn. Tr in the first stitch, mark stitch. Tr in each stitch until the 2 marked stitches at the armhole. 2 Tr in each of them, mark the 2nd stitch of the first increase, and the first stitch of the 2nd increase, such that the stitch markers are next to each other. Continue with Tr in each stitch until you get to the next marked stitches, repeat same, Tr in each of the remaining stitches of the row. 72 Tr
Row 9: Ch 2, turn. Tr in the first stitch, Tr in each stitch across. When you get to the marked stitches at the armhole, make sure to move the stitch markers to the current row. 72 Tr
Row 10: Ch 2, turn. Tr in the first stitch, Tr in each stitch across. When you get to the marked stitches at the armhole, make sure to move the stitch markers to the current row. 72 Tr
Row 11: Ch 2, turn. Tr in the first stitch, mark stitch. Tr in each stitch until the 2 marked stitches at the armhole. 2 Tr in each of them, mark the 2nd stitch of the first increase, and the first stitch of the 2nd increase, such that the stitch markers are next to each other. Continue with Tr in each stitch until you get to the next marked stitches, repeat same, Tr in each of the remaining stitches of the row. 76 Tr
Row 12: Ch 2, Tr in the first stitch, mark stitch, Tr in each stitch across.(remember to move up the stitch markers) Finish row 12 with a SS to the first stitch.
We start working in the round from round 13
Round 13: Ch 2, turn. Tr in the first stitch, Tr in each stitch around. When you get to the marked stitches at the armhole, make sure to move the stitch markers to the current row. SS to the first stitch of the round. 76 Tr
Round 14: Ch 2, turn. Tr in the first stitch, mark stitch. Tr in each stitch until the 2 marked stitches at the armhole. 2 Tr in each of them, mark the 2nd stitch of the first increase, and the first stitch of the 2nd increase, such that the stitch markers are next to each other. Continue with Tr in each stitch until you get to the next marked stitches, repeat same, Tr in each of the remaining stitches of the round. SS to the first stitch of the round. 80 Tr
Round 15: Ch 2, turn. Tr in the first stitch, Tr in each stitch around. When you get to the marked stitches at the armhole, make sure to move the stitch markers to the current row. SS to the first stitch of the round. 80 Tr
Round 16: Ch 2, turn. Tr in the first stitch, Tr in each stitch around. When you get to the marked stitches at the armhole, make sure to move the stitch markers to the current row. SS to the first stitch of the round. 80 Tr
Rounds 17 – 40: Repeat Rounds 14-16. Ending with a repeat of round 16
Make sure your project is on the right side
Round 41: Ch 2, turn. Tr in Blo of each stitch around.
Round 42: Ch 2, turn. Tr in each stitch around. Ch 1 and cut yarn.
Pleat
Attach yarn to the unworked loop from two rounds above. Ch 1, SS loosely in each stitch around, SS to the first stitch of the round. 112(128,144,160,176,192) stitches
Note: We don’t turn for the rounds here
Round 1: Ch 1, Dc in the Blo of the first stitch, Dc in Blo in each stitch around. SS to the first stitch of the round. 112 stitches
Round 2: Ch 2 *Tr 4 in Blo, Tr 4 in Blo of the same stitches, Tr 4 in Flo of the same stitches, Tr in the Flo of the next 4, Tr 4 in Blo of the same stitches, Tr 4 in Blo of the same stitches* repeat 14 times. Finish the round with a SS to the first stitch of the round. 336 Tr
Round 3: Ch 2, Tr in the first stitch, mark stitch, Tr in each stitch around. Ch 1 and cut yarn. 336 Tr
The upper pleat
Attach yarn to the unworked loop of the SS round
Working in the opposite direction so that the right side of the work is facing up,
Round 1: Ch 1, Dc in the of the first stitch, Dc in each stitch around. SS to the first stitch of the round. 112 stitches
Round 2: Ch 2 *Tr 4 in Blo, Tr 4 in Blo of the same stitches, Tr 4 in Flo of the same stitches, Tr in the Flo of the next 4, Tr 4 in Blo of the same stitches, Tr 4 in Blo of the same stitches* repeat 14 times. Finish the round with a SS to the first stitch of the round. 336 Tr
Round 3: Ch 2, In the first stitch, make Tr until you have two loop on your hook, insert your hook into the base of the fourth row above, yarn over and pull through all (we have “sewn” down the stitch, mark stitch, in the next stitch, *make Tr until you have two loop on your hook, insert your hook into the base of the fourth row above, yarn over and pull through all* Repeat for next 2 stitches. *Tr in next 16 stitches, “Sew” the next 8 stitches* Repeat around, finish row with “sewing” down the last 4 stitches, SS to the first stitch of the round. Ch 1 and cut yarn. 336 Tr
Watch this short clip on Youtube showing how to “sew down” the pleats
Finishing
Attach a zipper to the back of the dress
Weave in all ends
Attach any embellishment of your choice.
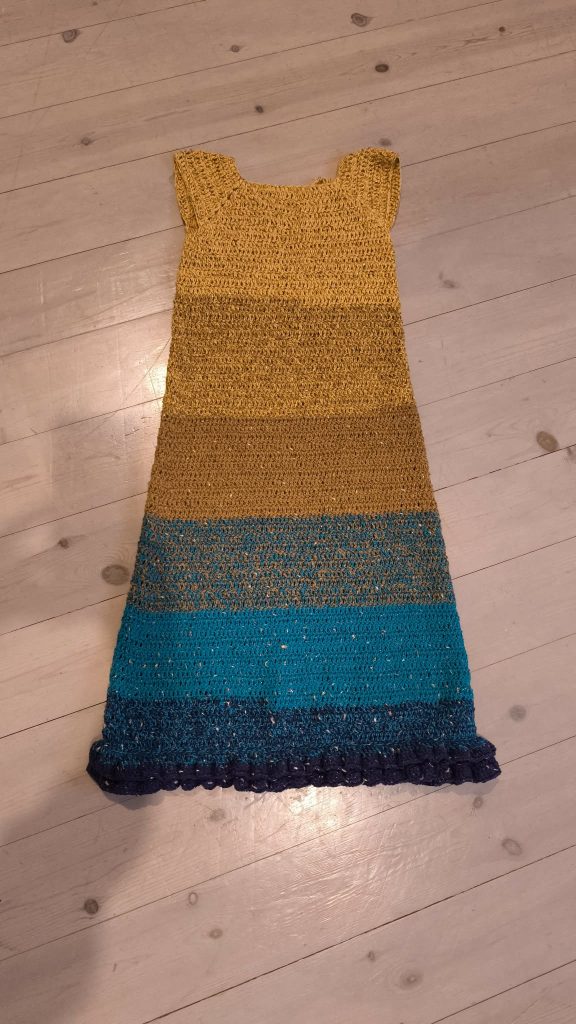
Finished Project
DISCLAIMER:
All patterns and pictures on this website is a property of Toyslab Creations. Please do not reprint, publish or post my patterns in whole or in part. Please don’t use my photos to advertise if you use my patterns to make and sell finished items.
Connect with me on Social Media